
Transform your furniture with Annie Sloan
Furniture Painting Masterclass
If you’ve always wanted to learn how to paint furniture but don’t know where to begin, don’t worry — we can help. Discover how to up-cycle old furniture into something new with expert guidance from British paint specialist, Annie Sloan. Scroll down through Annie Sloan’s essential painting supplies to learn which tools are best to invest in for use at home or in studios, including Annie’s favourite paint brushes, waxes, paints, and rollers as well as learning different ways of adding texture and patina to your painted furniture - particularly brilliant for a farmhouse, country look.
01
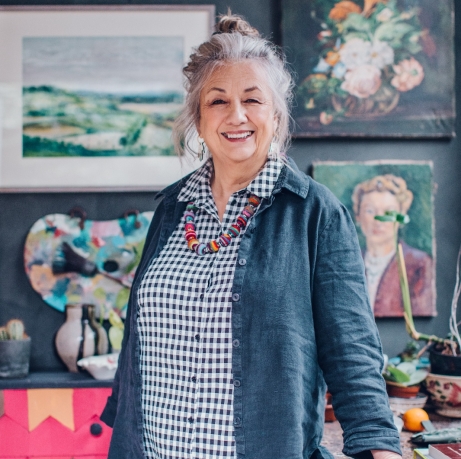
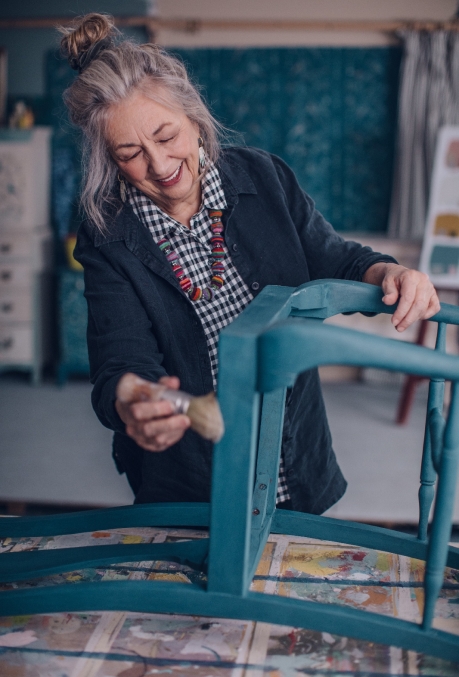
Meet Annie
Renowned author, artist and designer, Annie Sloan, is one of the world’s most popular experts in the field of decorative painting. After studying Fine Art at university in the 1970s, Annie went on to write her first book, The Complete Book of Decorative Paint Techniques – which is widely considered to be the industry bible on the subject. Since then, she has published 26 books on paint effects, colour, and interior design, and has transformed the world of furniture painting with the creation of her revolutionary paint, Chalk Paint. Passionate about empowering interior designers and hobbyists to reinvent their living spaces, Annie’s expertise and creative flair has led her to being named one of Britain's most influential female designers.
Known as one of the world’s leading authorities in paint, colour and style, Annie Sloan teaches her first-ever in-depth guide to transforming your home with colour. In over 4 hours of video lessons, you’ll learn step-by-step how to confidently use colour throughout any room, from painting upcycled furniture and kitchen cabinets to mastering decoupage and adding joyful hand-painted designs to vases, lamps, lampshades, and picture frames. Discover how to apply the principles of colour theory to any space, develop your own personal style, and gain the inspiration as well as the technical know-how to add character and charm to your own home.
02
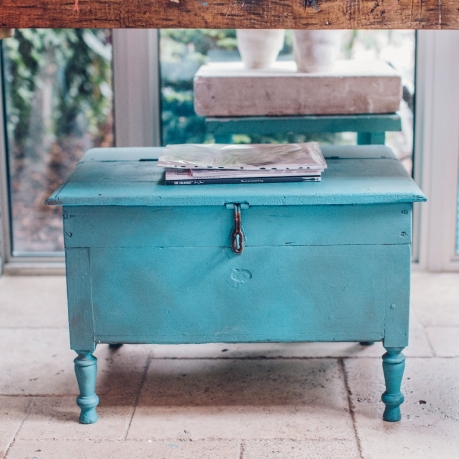
DIY Project - creating a rustic finish
There are many ways to create an aged look, depending on whether you’re after a farmhouse country look, or more of an antique patina. This particular technique will give you a textured, rustic finish. Learn different ways of adding texture and patina to your painted furniture - particularly brilliant for a farmhouse, country look.
1. Load up your brush with paint and apply it to the furniture quite thickly. Use smaller brush strokes to paint roughly so that you get brush marks and texture.
2. One way to get even more texture is to leave the paint to dry slightly, and then go back over it again with the brush when it’s still a little tacky and wet to add extra brush marks.
3. For a really chippy, textured look, try decanting a little bit of paint into a container and leave it to thicken for a while - you could also put it in the fridge overnight to speed up this process. You can then layer this on really densely. For an authentic effect, don’t use this all over the piece of furniture - just in small areas to give variation.
4. A stippled effect is another texture that can look great on furniture. You can do this with paint by repeatedly dipping the brush into a layer of wet paint.
5. Once the paint has dried, you can begin the really fun part - waxing! Clear wax is essential for every project, and particularly so when you’re experimenting with textured finishes. Always start with an initial layer of clear wax all over - this will seal the paintwork you’ve done, while also enabling you to remove darker waxes later on if you change your mind. Apply evenly with a wax brush, and then wipe off the excess with a lint-free cloth.
6. The next step is sanding. Annie usually starts with a medium-grade sandpaper to see how the surface responds. Lightly sand the paint to reveal small parts of the wood beneath - if you used two layers of different-coloured paint, this is where you’d start to reveal the base layer. Thicker areas of paint may require a more heavy-duty, coarse sandpaper.
7. Edges are a good place to sand, as they emphasise the shape of the furniture. You can also think about where the piece might naturally have aged; for example, where you might pick up a chair would be a natural place to see some signs of distressing and wear.
8. It’s a good idea to wax and seal between each layer of work, especially after you’ve sanded, as this ensures you can remove any unwanted darker waxes later.
9. Now you can introduce some dark wax to begin experimenting. A word of warning: it will go on quite strongly - but don’t be alarmed! After you’ve applied it, wipe it back with a lint-free cloth. You can also lift parts of it off using clear wax for an authentic, uneven look. White wax is great for knocking back the severity of darker waxes if you prefer a softer finish.
10. Continue to experiment with adding darker waxes to different areas, using them to highlight all the brush strokes and marks you made earlier. You can also sandpaper over the wax layers to introduce even more texture. A stripping knife is great for chipping away at areas of paint to give a really rustic and distressed effect. It’s best if the paint is completely dry for this technique.
03
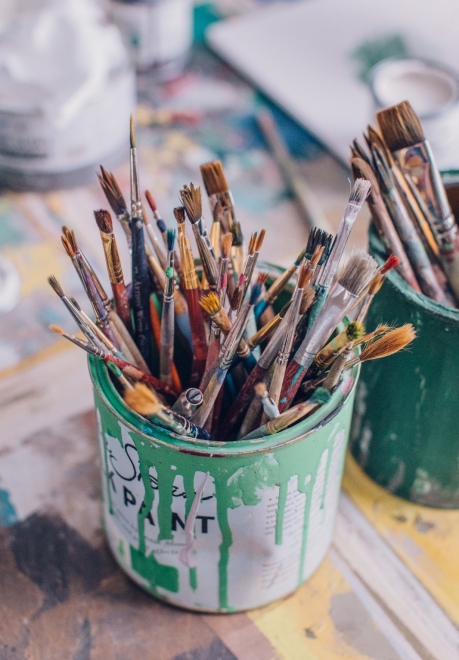
The tools you need - brushes
To paint furniture, you need a good selection of equipment – and if you invest in quality tools, they’ll stand the test of time and become treasured objects. All of Annie Sloan’s favourite painting supplies can be easily found in good art and hardware shops.
Chalk Paint brushes - Annie Sloan’s bristle Chalk Paint brushes are perfect for producing a textured, vintage finish. The bristles are strong, yet pliable, and are made of predominately pure bristle with natural split ends, allowing you to paint expressively. They hold a large amount of paint and can also be used for applying wax.
Oval shaped brushes - Oval-shaped pure bristle brushes are perfect for producing a textured, vintage finish.
Flat brushes - These flat brushes are designed to take a large amount of paint and to apply the paint evenly, minimising brush marks.
Smaller detail brushes - A detail brush set is ideal for painting fine details and dynamic shapes, bringing a no-fuss approach to mark-making and decorative painting.
Wax brushes - These wax brushes are shaped into a helpful point to assist with working wax into intricate, detailed areas and tight corners.
Wall paint brushes - Annie prefers to use these high-quality brushes for painting walls as they do not take any longer to apply than rollers and give a beautiful, textured finish.
Cutting-in brushes - Perfect your cutting-in with this angled sash cutting-in paint brush.
Stencilling brushes - Annie Sloan’s pure bristle stencil brush is ideal for stippling and the perfect complement to the Annie Sloan Stencil Collection.
"This is about getting confidence with colour, with how your room should be, the things you need to dress it with, - and how to paint, really - why it works, and how it works."
04
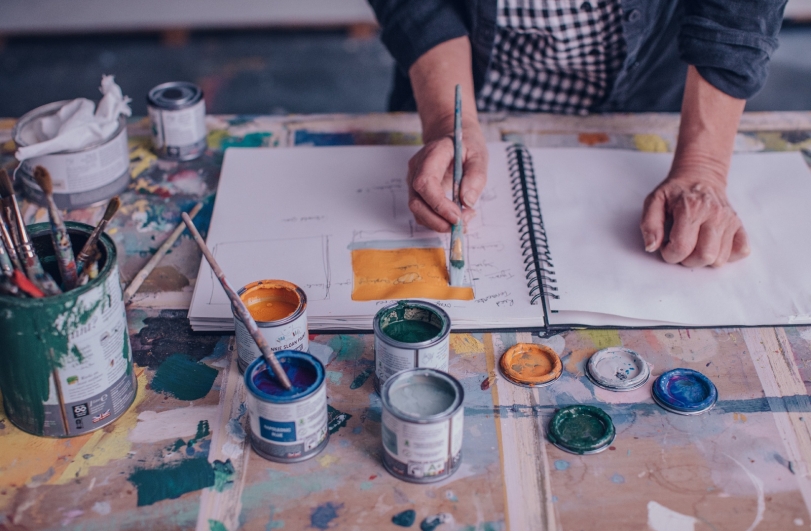
Toolkit essentials
Sponge rollers - A set of sponge rollers are a must when using stencils or applying lacquer.
Mixing sticks - Perfect for stirring, painting, gluing, and constructing.
Paint tin opener - The perfect addition to any painter’s toolbox, open any paint tin with ease using this handy tool.
Masking tape - Masking tape will enable you to keep very crisp lines in your painting.
Lint free cloths - Use lint free cotton cloths to protect your workspace.
Foam kneeling pad - To ease your knees from strain when painting those tricky bits be sure to buy a foam kneeling pad for comfort while painting.
Sketchbooks - Jot down your ideas and colour combinations in one place. Collage, paint and sketch your way into a more colourful interior.
For further advice on painting watch a free lesson from Annie Sloan’s online course and discover over 4 hours of inspiration, from painting upcycled furniture and kitchen cabinets to mastering decoupage and stencilling.


